Table of Contents
Win more bids. Close more jobs. Start with our newsletter.
Get exclusive insights, tips, and trends your competition doesn't want you to know.
While we’d like everything to fit into a single box, real life isn’t always that easy.
Sometimes, your work out in the field needs to be split up between several different “mini-jobs”, helping you keep each part of the overall job organized and in progress.
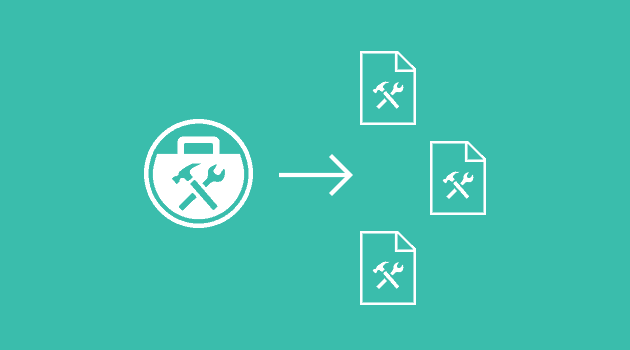
With the JobNimbus roofing software, this can easily be done by creating Work Orders. With them, you can take one overall job for a customer that requires several different pieces and break that job into bite-sized instructions for your team to get done.
Let’s say a homeowner calls in and needs to have their roof inspected. But, when you go over there you realize they’re also going to need a whole new gutter system and brand new siding on one side of the house.
With Work Orders, the roofing, gutters, and siding would each become “sub-jobs” that you can manage as part of the overall job for this homeowner. You can track Types, Statuses, Custom Fields, and even run reports on them.
Even more convenient is you can create those orders from the same estimate you made for the entire job. This way, the estimate includes all the materials and labor you’ll need for the job, but you’ll be able to pick and choose which parts of the estimate go with which order and be able to assign the tasks and materials accordingly.
Splitting Out Your Jobs Into Bite-Sized Work Orders
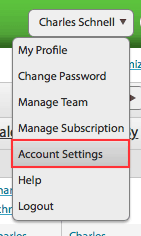
The first step is to enable Work Orders in your account. To do that, go into your Settings, then to the Features tab.

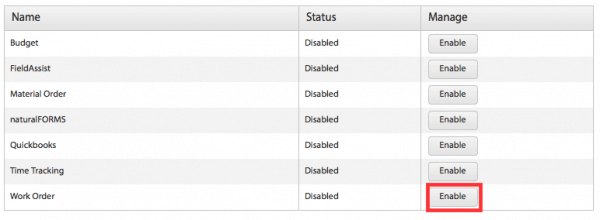
You’ll find Work Orders at the bottom of the list. To enable it, just click Enable.
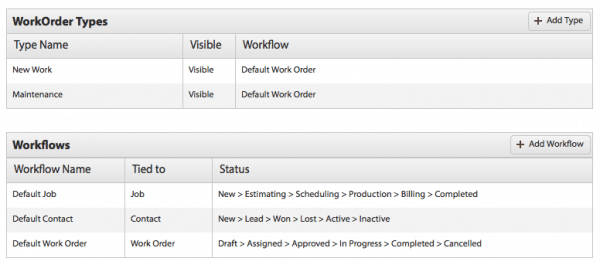
Once enabled, you’ll see two new tabs in your Settings: Work Order Fields and Work Order Types & Statuses.

Work Order Fields lets you create new custom fields that you can use to fill out extra information on your orders. Those can be measurements, dates, dollar amounts, or even checkboxes.

Work Order Types & Statuses works the same as creating and organizing Types & Statuses for your jobs or contacts. You’re able to create new workflows, assigning statuses to each one, which you can then choose from when creating your Work Orders.
Once you have everything set up, you’re ready to start creating your first Work Orders.
When you go to a Job (or Contact) now, you’ll see a new tab for Work Orders.
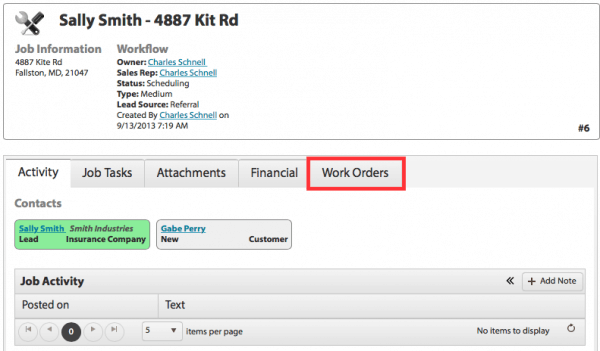
Clicking on the tab will reveal a new link for +Add Work Order.

This tool looks and works like the estimate/invoice tool. Right off the bat, you’ll notice several similarities:
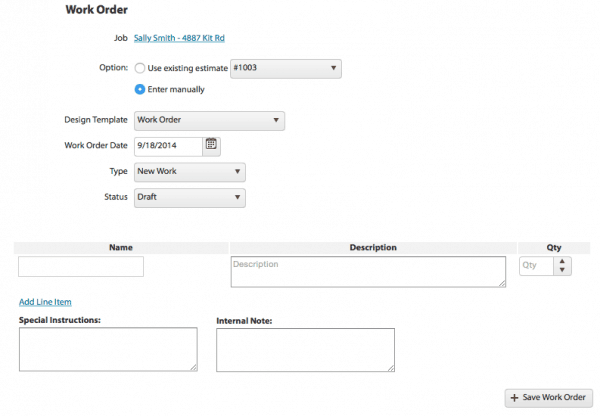
First, you’ll see the Job this Work Order is attached to.
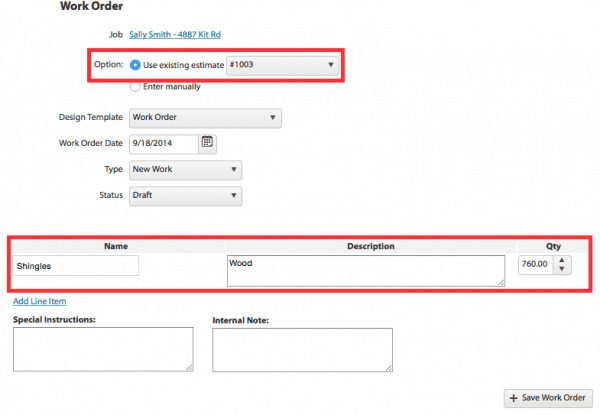
Then, you get a nifty option to choose whether you want to create this Work Order from scratch (Enter manually) or import it from an estimate on the job (Use existing estimate), which makes things really convenient.
You can choose a design template from one you’ve created in the Templates tab of Settings. For help on creating templates, see here.
You can choose the due date for the Work Order, followed by the Type and Status that you set up earlier.
If you chose to create your order from an estimate, you’ll already have your line items ready to edit, re-order, add, delete, or simply save.
If you are creating your Work Order from scratch, you can add line items to the order the same way you would when you’re creating an estimate or invoice.
You can add as many line items as you need, each with its own description and quantity.
You can also add Special Instructions for the recipients, plus an Internal Note that you’ll be able to see without even opening up the Work Order.
Once you’re done, just click + Save Work Order.
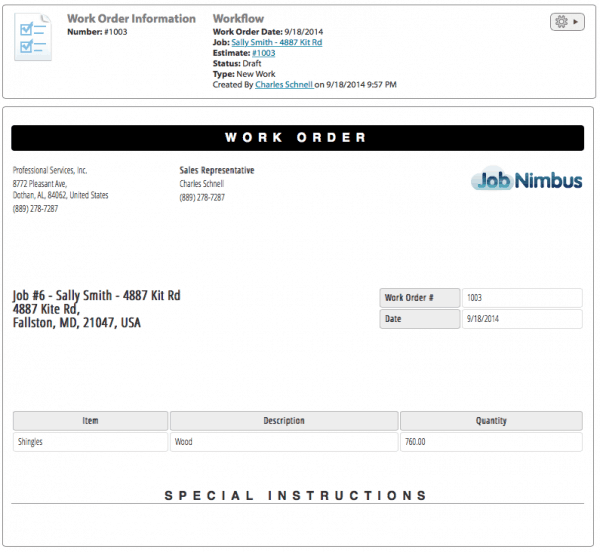
You’ll see your order is now created and ready for you to share it with your team.
You will get a preview plus other details that help you manage it.
If you click the Action Menu gear icon, you’ll be able to see everything you can do.
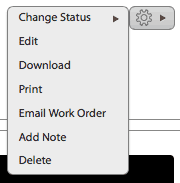
You can change the status of the workflow, edit it, download it as a PDF, print it, email it, add a note to it, or delete it.
A great way to assign out orders to your team is by emailing it to them directly from JobNimbus, but you can send it however you’d like.
With Work Orders created and assigned out, you’re already much further on your way to getting the overall job completed on time and within budget.
If you have questions or would like to learn more, feel free to leave us a comment below or send us an email to support@jobnimbus.com. We’ll be happy to assist you.


Blog / Guide Title CTA
Once you've created a strong Linkedin profile, you can leverage it as part of your broader marketing strategy. Use your Linkedin to share content, join industry groups, and network with others in the contracting space.
If you're looking for additional marketing support, consider partnering with JobNimbus Marketing to maximize your business growth. Schedule a call with our team to learn how to boost your marketing efforts today.

Download Our Free Tips for Recession-Proofing Your Company
We’ll show you five simple things you can do to help your business survive a recession.



.jpeg)


