Take a look at your roofing website. Do your photos look just like everybody else’s? Are you pulling the same stock photos as your competitors, making your business fade into the background?
The truth is every roofing business website needs personalized images. They show off your team, personality, and skills—which can ultimately lead more people to do business with your roofing company.
While you can hire a professional to take pictures for your website, the cost builds up quickly, and you don’t always get the photos you want. You have an alternative: take your own photos.
You don’t have to take a photography class or buy expensive equipment to get professional-quality photos for your company’s website. You just need a camera (your phone camera counts!) and a willingness to try it out yourself.
We’ll walk you through five tips for using your phone to take pictures at the job site, how to take photos of your team for your roofing website, and essential photography tips to optimize your website photos.
Let’s jump in!
How to Take High-Quality Phone Pictures at the Job Site
Pictures of your roofing work help sell your services. It’s great to snap some photos before, after, and sometimes during your roofing projects. We’ll walk you through the best ways to get good images using just your phone.
1. Follow Basic Photography Guidelines
Composition
Composition is simply the way things are arranged in your photo. Standard composition techniques make images more appealing and draw more attention. While there are dozens of compositional techniques, we’ll cover four of the most common here.
The Rule of Thirds
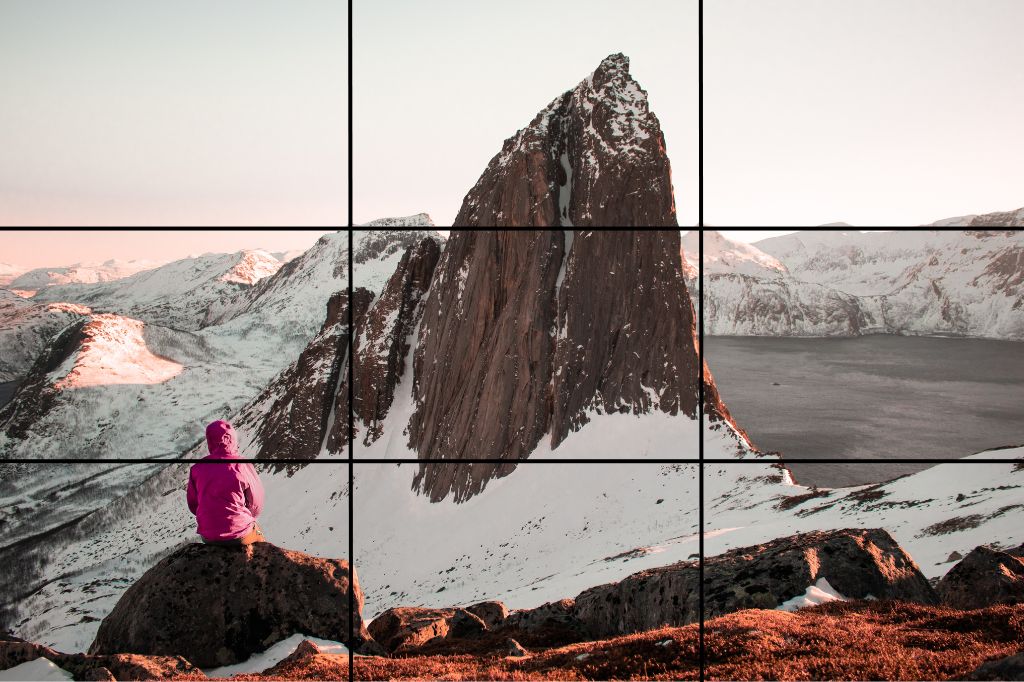
The rule of thirds divides an image into three evenly spaced rows and columns, creating nine spaces. This rule suggests that the picture’s subject should be along one of the nine lines.
The four spots where two lines intersect are excellent places to put points of interest!


The picture above follows the rule of thirds in multiple ways. One of the vertical lines is right next to the edge of the rock the person is sitting on. Additionally, all the mountains sit at the same horizontal line in the background.
Many basic cameras even have a grid option that will show you the rule of thirds as you take a picture. If yours doesn’t, just envision overlaying the grid on your photo and adjust as necessary.
Symmetry
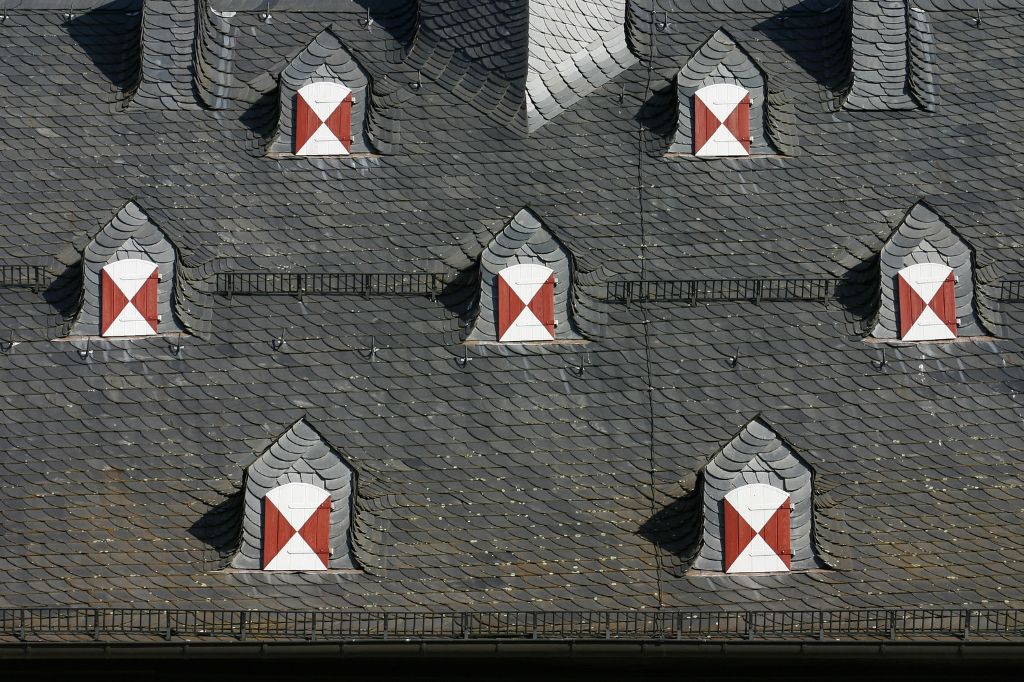
Humans love symmetry. The natural balance of having two (or more) equal parts draws viewers to the image and prompts a sense of harmony.


Notice how the odd number of gables still creates an overall balance in the second picture.
Negative Space
Negative space is purposefully leaving emptiness in the image. Since there’s so much emptiness, your eye automatically goes to the one thing that takes up space.

This picture of a tree uses negative space and color to capture your attention immediately. Negative space can be helpful in specific cases, but you don’t need it for every image.
Leading Lines
A picture with leading lines has a line that takes your eye from one point to another. This line can be natural or artificial. Leading lines are a great way to direct attention to where you want it.

For example, this building’s straight lines pull your eye from the bottom all the way to the top. Your gaze should automatically start at the bottom of the building since it goes off the border.
Focus
Your roofing company website shouldn’t have blurry pictures. Those might work for graphic designers and influencers, but you should have more focused images to demonstrate your professionalism.
However, you might want only part of your picture in focus. The focal point will determine what and how much you should focus on in each image.
If you’re taking a picture of one of your roofing staff members, blurring the background will help their features stand out. On the other hand, if you’re taking a picture of a roof you worked on, you’ll want to show off the whole roof, which requires less focus on one part of the image.
Resolution
Resolution means the level of detail in a photograph. You’ll want to take high-resolution photos for your roof website. Higher resolution will let your pictures stay crisp and clear even if you stretch them out.
Camera resolution is generally measured in PPI (pixels per inch). The higher the PPI, the higher the resolution.
2. Hold Your Phone Still
If your phone is shaky, your pictures will be too. Steady your hand by holding it against something like a wall or square of shingles.
Alternatively, you might buy a mobile tripod to hold your phone. Using a tripod stabilizes your phone, so you get crisp, professional-looking pictures every time. As a bonus, you can find a lightweight, collapsible phone tripod for under $20.
3. Try Different Perspectives
When you take photos of a roof, try using multiple perspectives. Get creative with the way you look at the roof. Shoot a few pictures from the side, down below, or maybe even from above. Playing with different angles lets you find the best one for your specific situation.
If you find yourself stuck using the same perspective every time, ask someone on your team how they would take the picture. What stands out to them? Their fresh perspectives can open your eyes to new angles and even better images.
4. Avoid Zooming In
Capturing details of the roof you’re working on is wonderful. But you shouldn’t use the phone’s zoom capabilities to see those details. The zoom function reduces resolution, making the image blurry or grainy.
If safety permits, get physically closer to what you’re photographing instead of zooming in.
5. Take Advantage of Photo Editing Apps
Every picture can be even better with a few edits. Luckily, you don’t have to have a photography background to edit your images. Some phones have photo editors built into their camera capabilities, but you can also download an app.
We recommend the Adobe Lightroom app. It offers several professional-quality editing features for free, with the option to upgrade for all features. Our favorite thing about the app is that it has an “auto” setting that immediately polishes your photo with just one tap.
How to Take Roofing Team Photos for Your Website
Including a picture or two of your roofing team on your website helps potential customers connect with you. It’s also an excellent way to show appreciation for your employees and attract quality talent to your company.
If you’re going to take company team pictures yourself, here are six things you’ll need to do.
1. Find the Right Setting for the Image
Where you take your company photos significantly impacts results. Shooting your group photos at a business park gives a very different impression than in an alley.
Here are a few locations you might consider:
The Outdoors
Take your whole company to a park or forest to give your team photos a woodsy, natural feeling. This approach is especially applicable for roofers since many of your team members work outside.
In Front of Your Office/Company Sign
Does your roofing business have a physical location? Put it to good use by doing your office photoshoot right outside of it. Your photos will be even better if you can see your company name on the building.
2. Set a Dress Code for the Picture
Create a cohesive picture by having your team follow a dress code.
You don’t all have to wear the same shirt, but you should follow the same guidelines. Make a color scheme based on a color everyone has on hand or your company colors (check out our guide about choosing brand colors for your roofing business).
Neutrals look good on everyone and work well in color or black-and-white photos. We recommend staying clear of patterns and pale colors to prevent the image from looking washed out.
3. Choose the Right Time
The time of day you take company pictures dictates the amount of light you have to work with. You might be tempted to take everyone outside during a lunch break, but sunny afternoons can make people squint and cause harsh shadows. That’s not what you want.
Instead, try to take pictures during “golden hour,” the hour after sunrise and the hour before sunset. Golden hour provides warm natural light that translates well into photos. Keep in mind that golden hour changes based on the season and day.
4. Capture Smiling People
You don’t have to have a big grin in your roofing website photos—in fact, this study says you might not want to—but you should have some sort of smile. Smiling lets potential customers see you as more approachable and more of an individual.
If you take pictures of your customers for testimonials, you want to capture them smiling. Their smile is a testament to how you solved their problem and will convince others that you can help them too.
As a side note, you don’t have to smile in candid photos. Since candid photos already happen in a natural setting, you want authentic emotions. But you should still avoid angry or sad faces that could send the wrong message of you being unpleasant or hard to work with.
5. Think About Orientation
When you take your photos, you should be mindful of using landscape or portrait orientation. Landscape orientation means the top and bottom of the image are longer than the sides. Portrait orientation is the opposite, with longer sides.
For websites, landscape photo orientation is king. Landscape orientation lets your photos better fit the width of a computer screen, enhancing the experience for your potential customers.
Plus, if you need to crop the image down, you’ll get more content in a landscape orientation photo than in a portrait style.
6. Work with Each Team Member Individually, If Needed
Let’s face it. Your team is running in several different directions all at once. What if you can’t get everyone in your roofing company to take a picture at the same time?
The best way is to take individual photos and merge them into one picture. You will need to do some picture editing to combine all the images, but it’s worth it for standardized employee headshots. As a bonus, separate photos make it easy to change out if someone joins or leaves your team.
To easily combine your team photos, ensure everyone has the same background.
Take Professional-Looking Photos for Your Roofing Website
With these tips in mind, you’re well on your way to becoming the resident photographer for your roofing business. You’ll be able to snap stunning shots at the job site, in the office, or even at company events with just your phone.
Having professional-looking pictures is just one part of optimizing your roofing company website. Check out our comprehensive guide on how to build roofers’ websites that convert site visitors into customers.
What tips will you use to take photos for your roofing company? Let us know in the comments below!


